
Foreword
I really did not feel compelled to install a tail tidy for this bike. The OEM version, while not pretty, is quite acceptable in my opinion. That said, one needs something to tinker with during the winter…
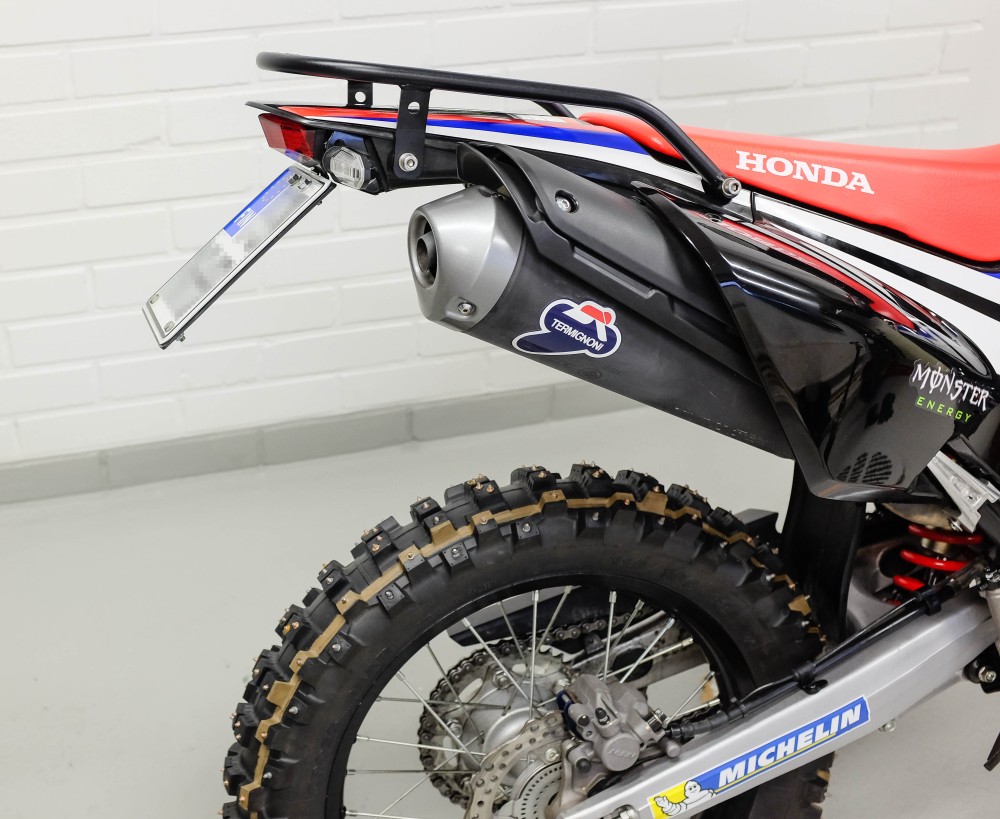
Installation method
I wanted to do a non destructive install, meaning that I want to be able to revert back to the original if I’m not happy with it or it breaks or something. The following is in no way meant to be a “how to” installation instruction. Many people seem to have question about the fit and installation, so I though I would document it as well as I possibly could.
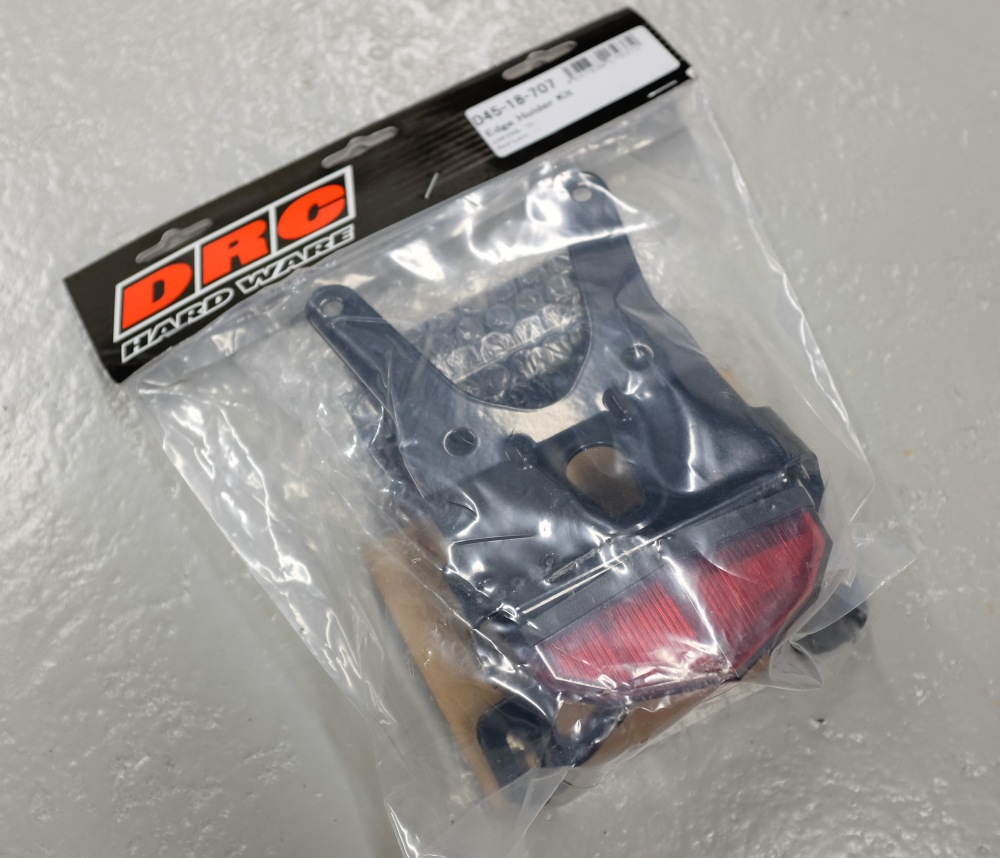
The product
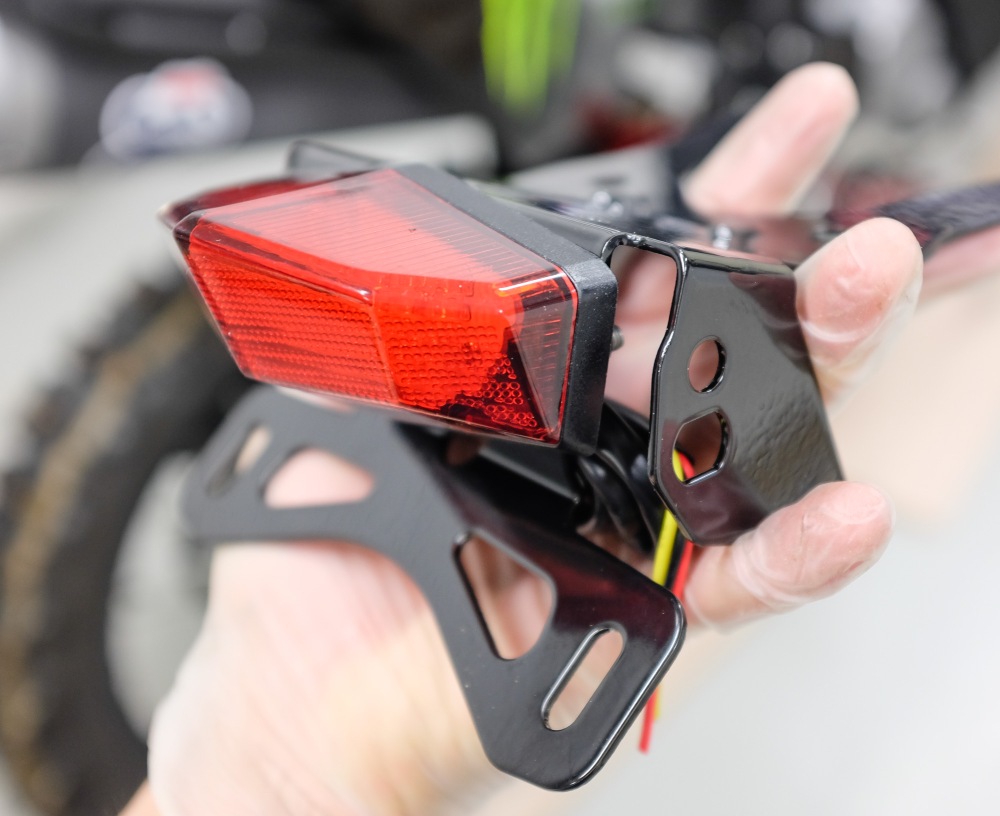
What you get is black steel (not Stainless I assume) bracket with a the tail light/plate light combo attached. In addition to that you get a metal cover plate, two screws and some crimp connectors.

The issues
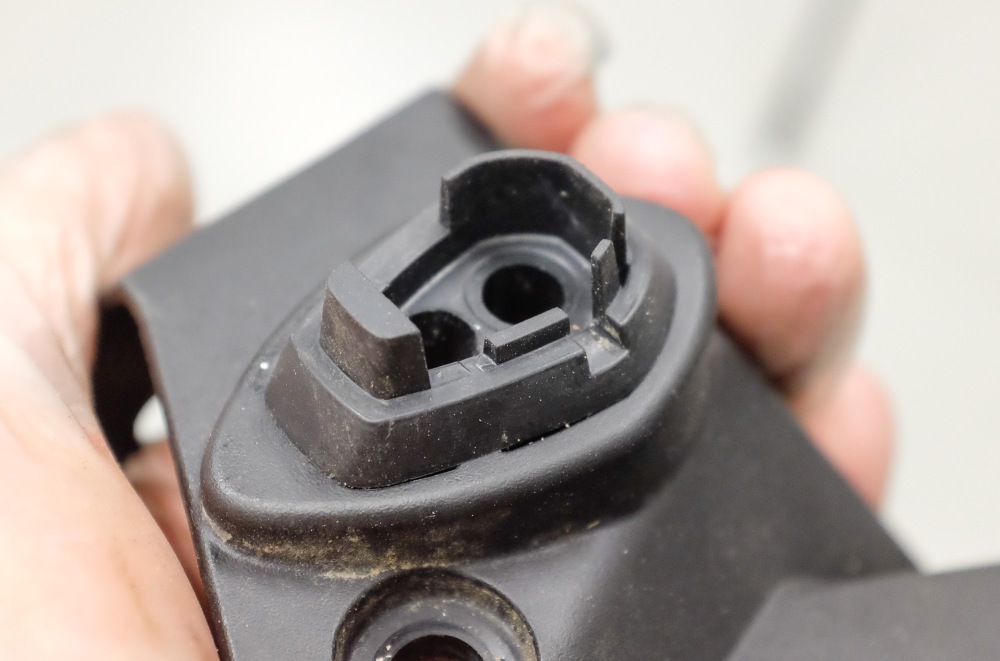
1. The LED indicators do not fit in the mounting holes
I knew this beforehand and it is because the kit is originally made for the 250 L that does not have LED indicators
– there is no hole for the wire
– the hole is too small for the mount to fit
2. There is no Honda compatible connector included
This means you would have to cut the connector from the OEM light which is something I did not want to do in case I wanted to revert back to the original setup.
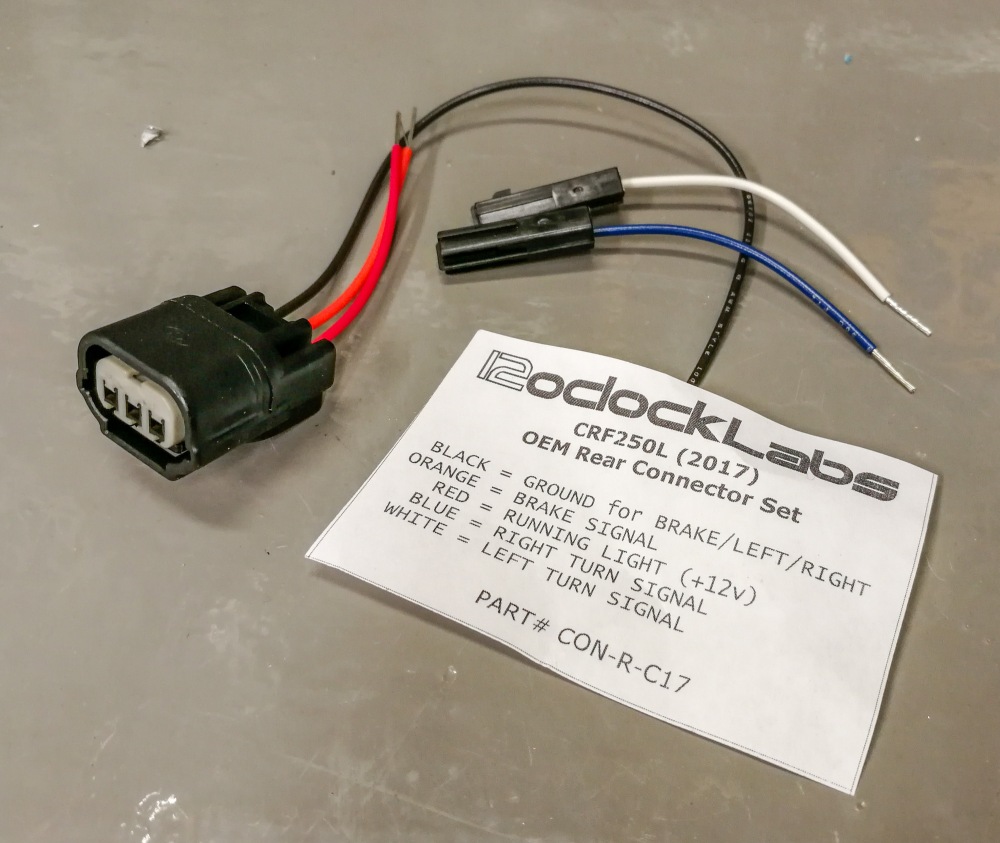
12oclock Labs connector
12oclock Labs (and crfsonly.com) sell a connector that allows me to keep the OEM parts unharmed and simply plug the new tail light to the appropriate connector. (The blue and white wired connectors are not needed in the installation.)
The installation
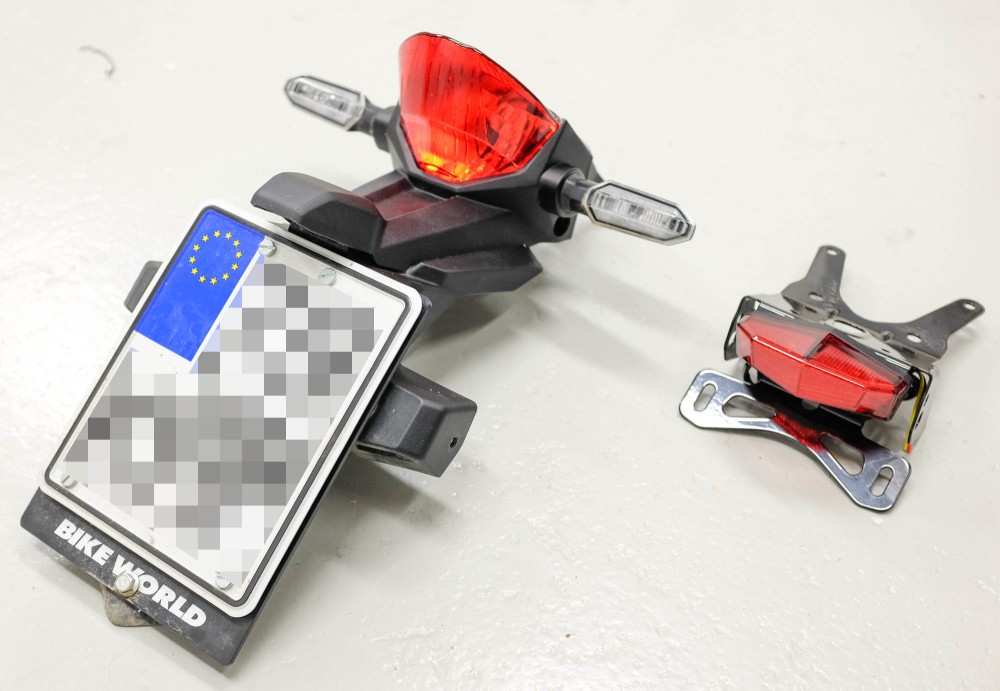
First you need to get the old fender off. To access the fender bolts you need to remove the seat, possible rear rack, and finally the rear plastic covering the top of the rear.

You do not need to remove any of the side panels. Bending the back ends of middle panels out a bit allows the top plastic to be removed. (the top plastic cover and middle panels are joined only by plastic tabs)
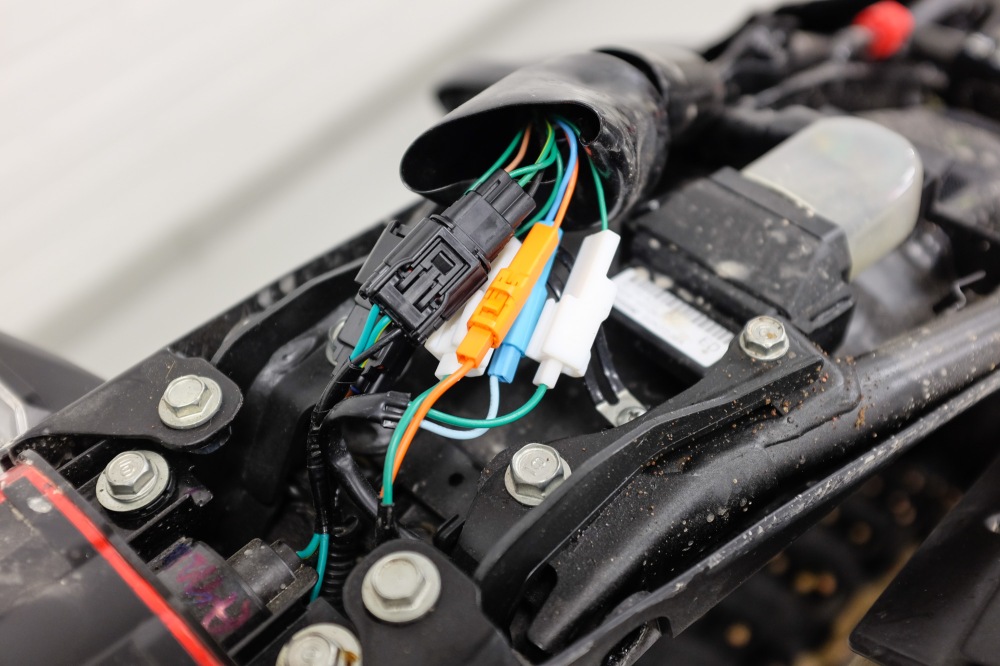
Once you get the plastic covers off, you need to unhook the connectors.
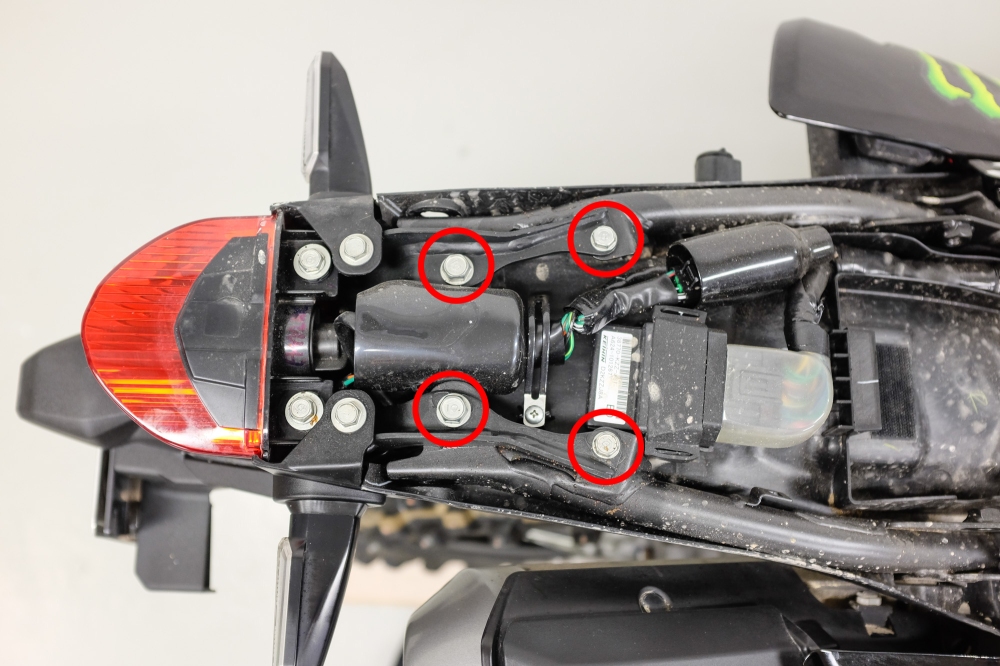
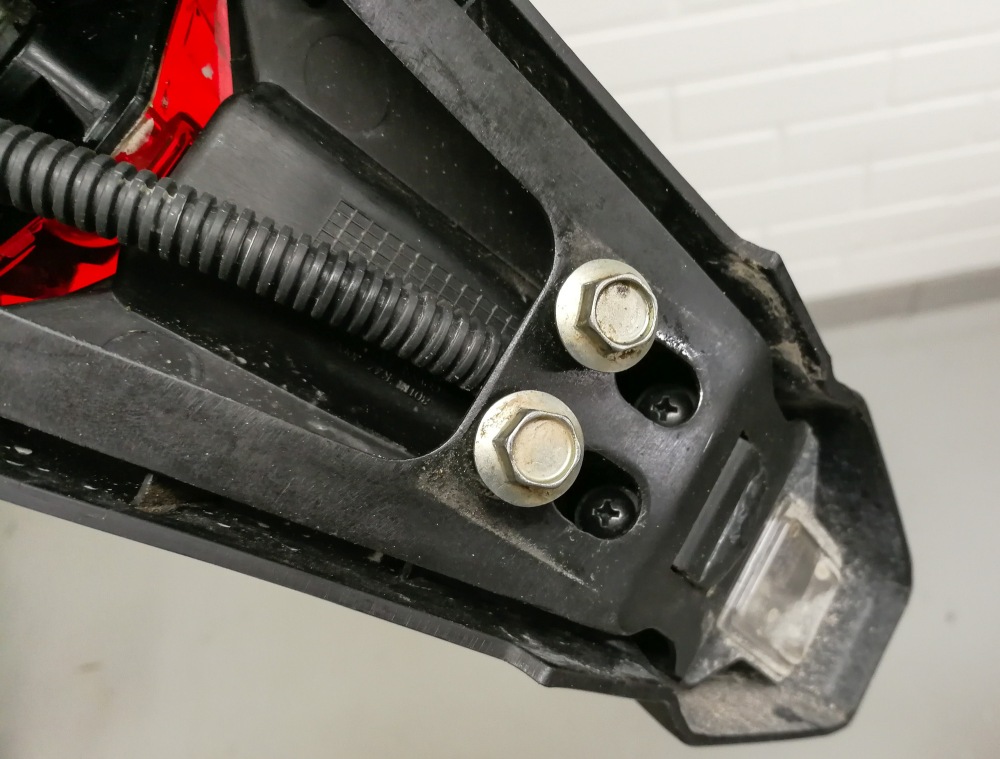
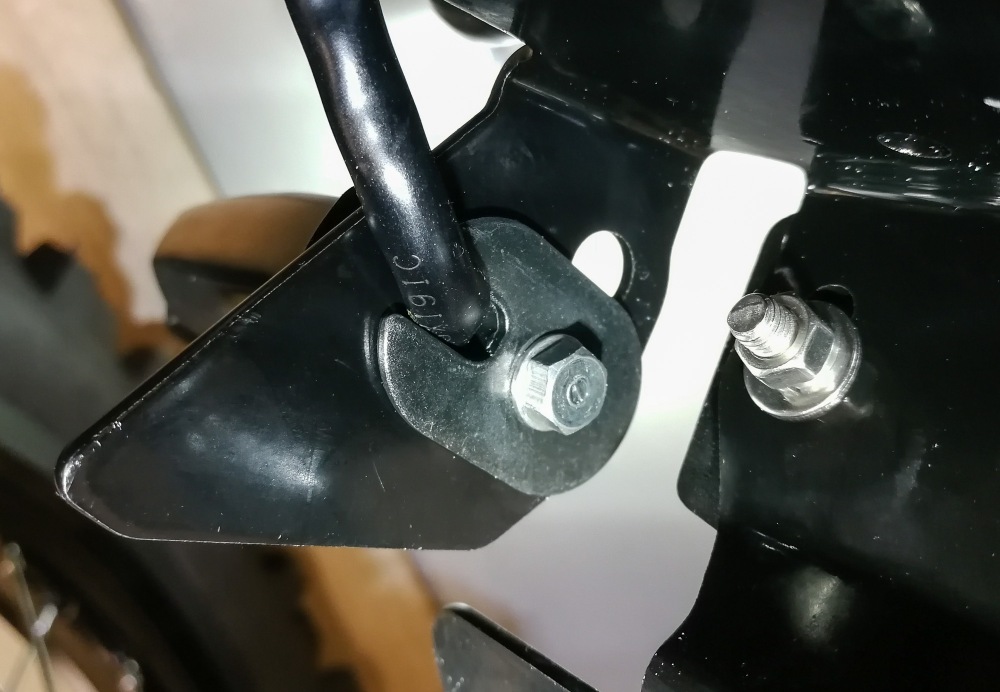
Next you can take off the fender by removing the 4 bolts pictured above.
The fender comes off as a one unit but you need to disassemble that to get access to the indicator mounting bolts.
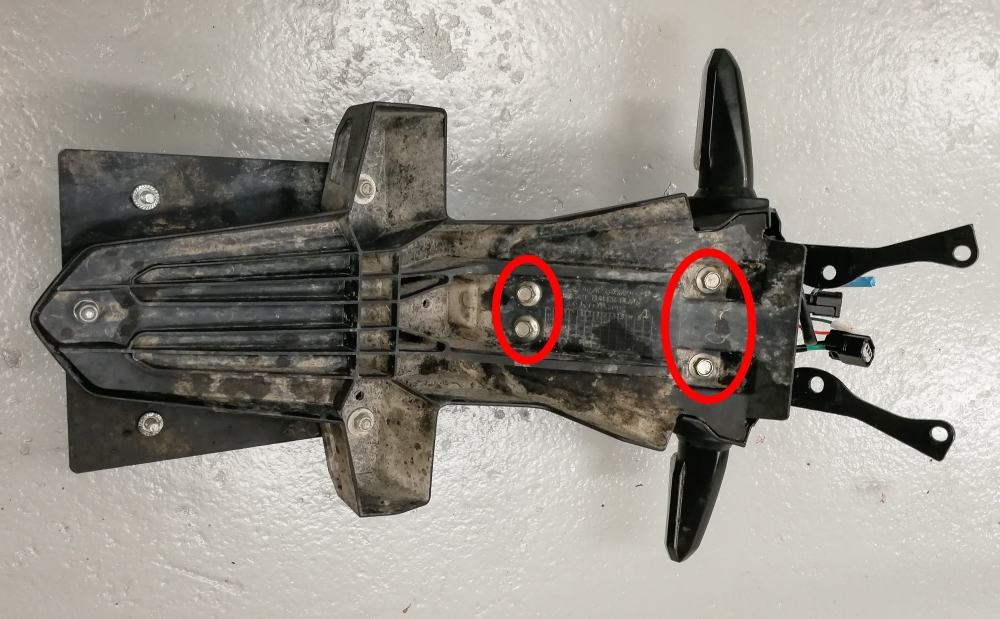
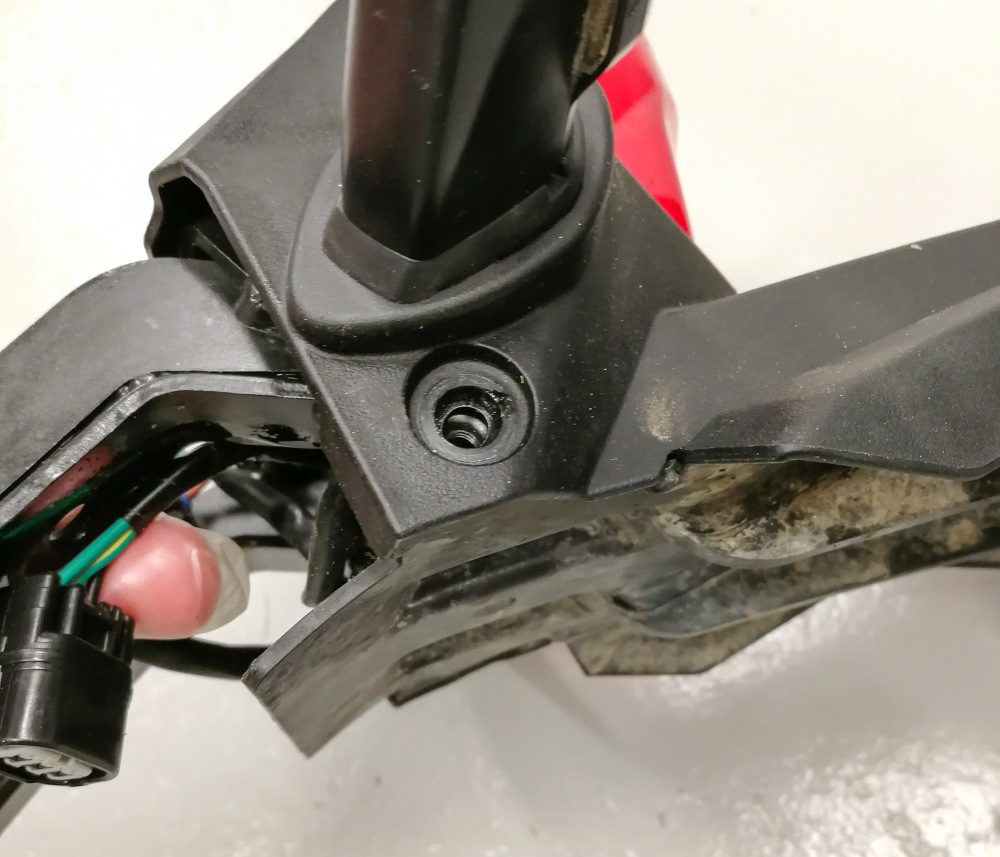
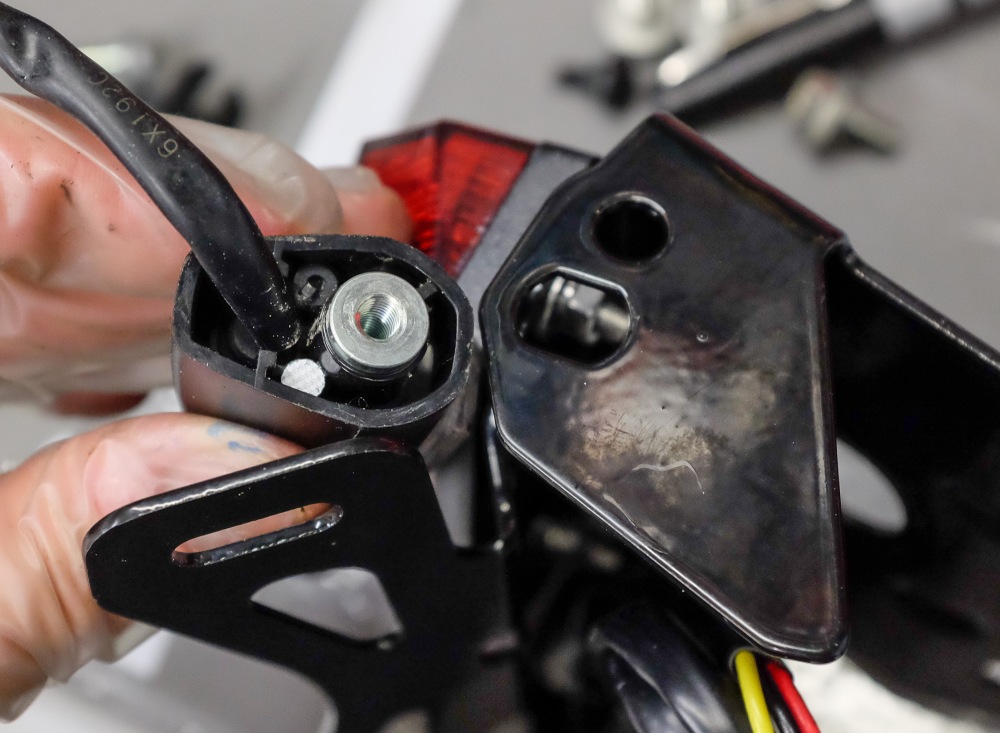
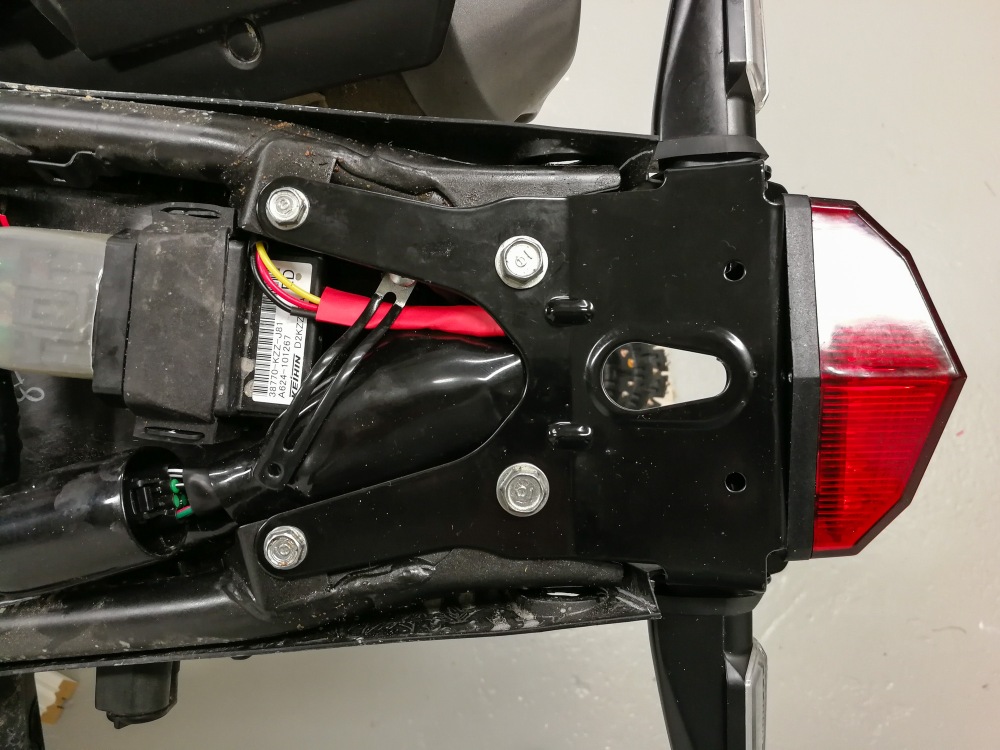
You should now have access to the indicator mounting bolts. Remove the bolts and pull out the metal black backing plate shown below.
Once you have removed the backing plate you can thread the wires thorugh the rubber grommet and free the indicators.
In my way of mounting the indicators to the DRC you also need to pull out the rubber grommets. Push them out from the inside out.
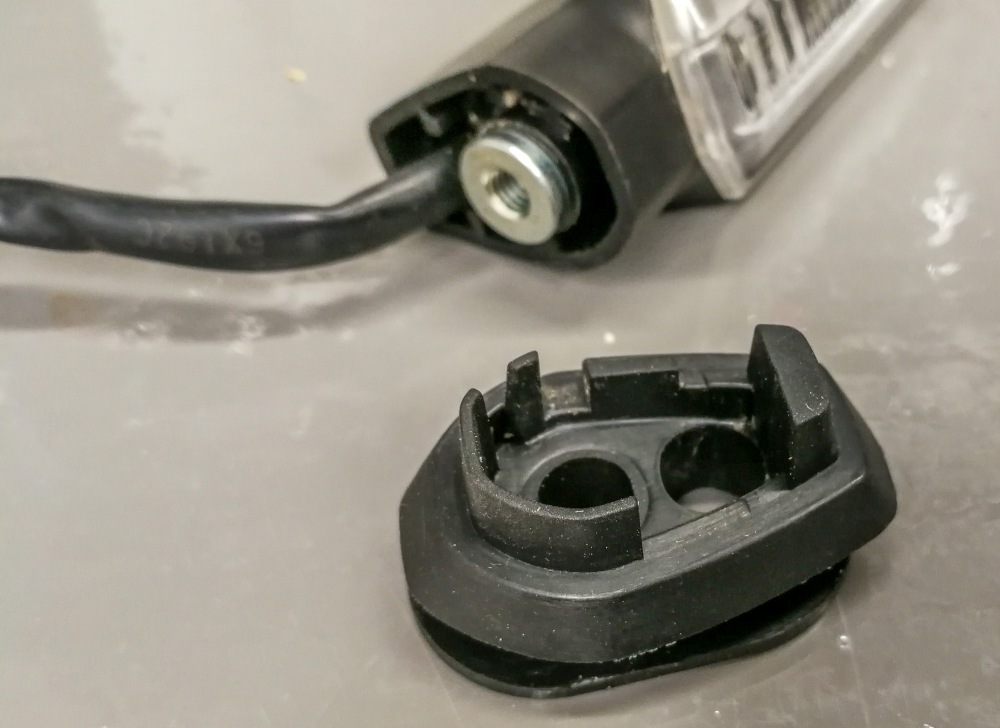
Now you need to start modifying the DRC bracket. I drilled a hole for the wire and enlarged the holes so I could re use all of the indicator mounting parts and keep some flex to the indicators. There are other methods of doing this, but I felt this was the path of least resistance.
(another method can be found there: (post #1241) http://advrideur.com/index.php?threads/honda-crf250-rally-owners.1212233/page-64#post-32556974
Note that the shiny mounting tab on the indicator protrudes from the plastic part enough to be a tiny bit too long for the indicator to be directly bolted one without washers of some sort, even if the hole on the bracket was enlarged.

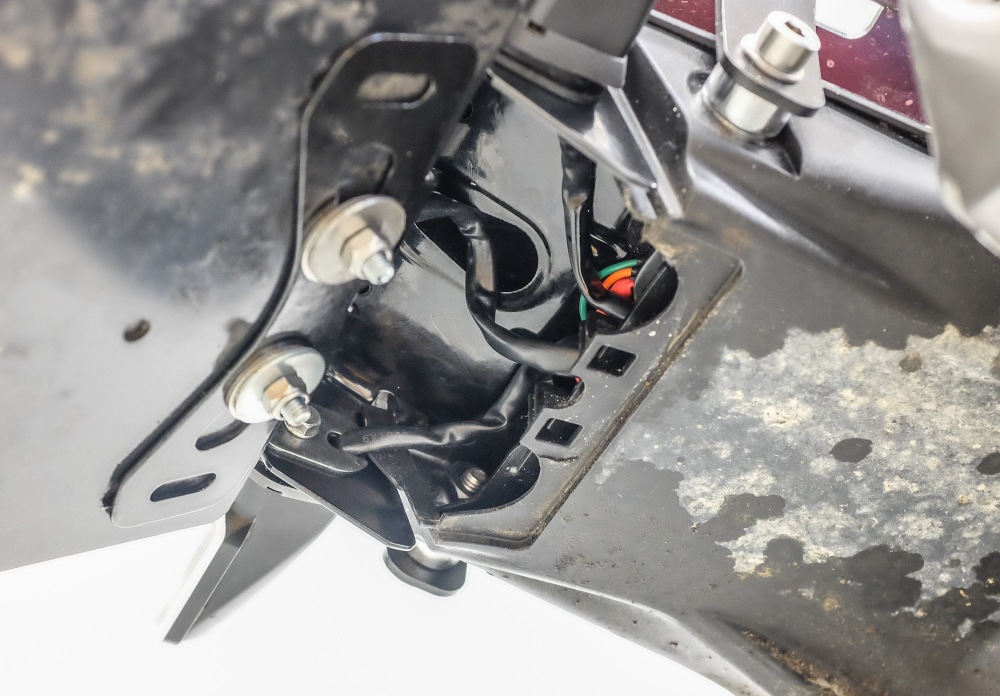
Then it’s time to work out the connections. For the plug I received the correct wiring was as follows.
Tail light 12oclock connector
black black
yellow red
red orange
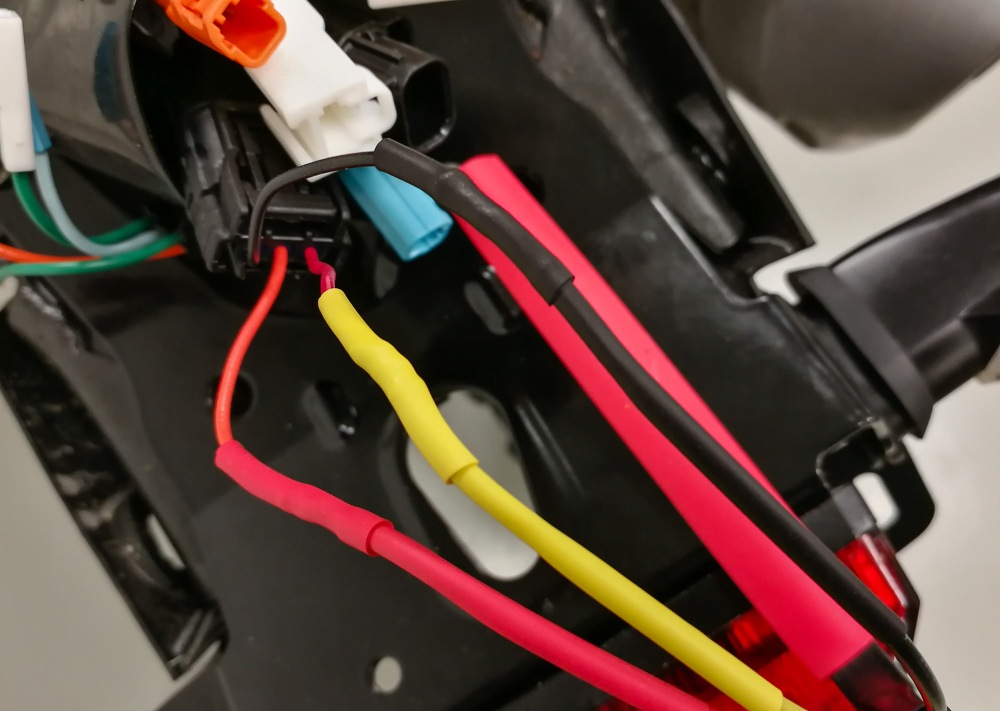
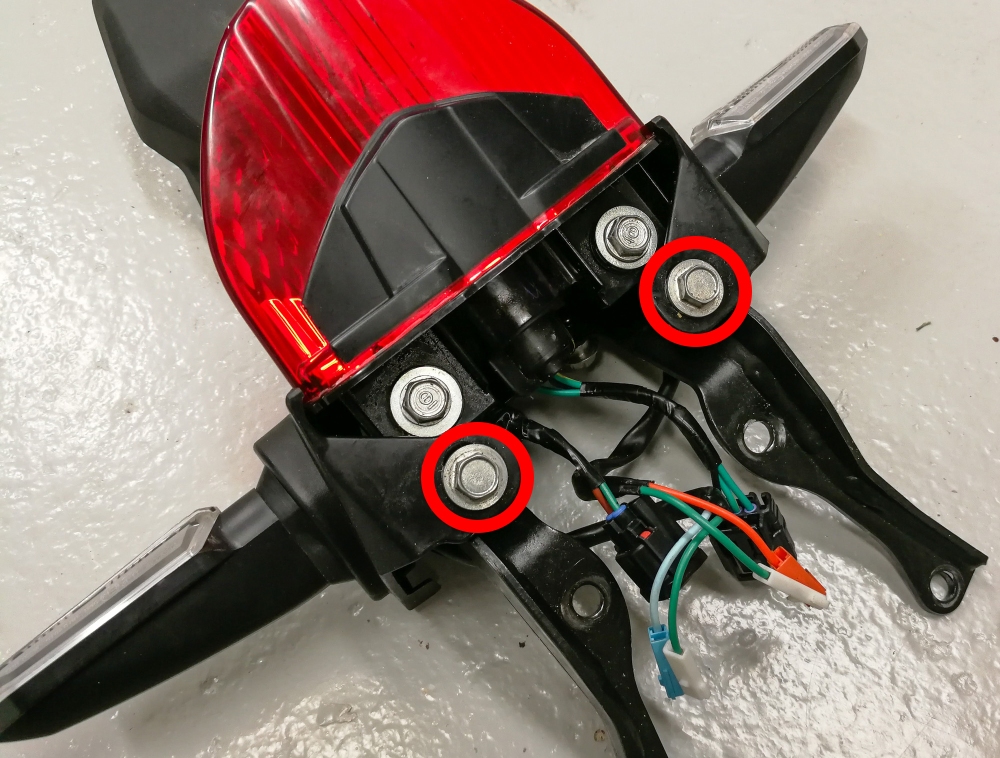
Now you can simply connect the plugs. Indicators are colour coded so it’s an easy task. Notice that the licence plate light connector is left empty as the licence plate light is now integrated in the tail light.
Once you have tucked the wires back in their place inside the rubber boot, it’s time to put the cover plate on. It there to keep at least some of the crud away from the wires.

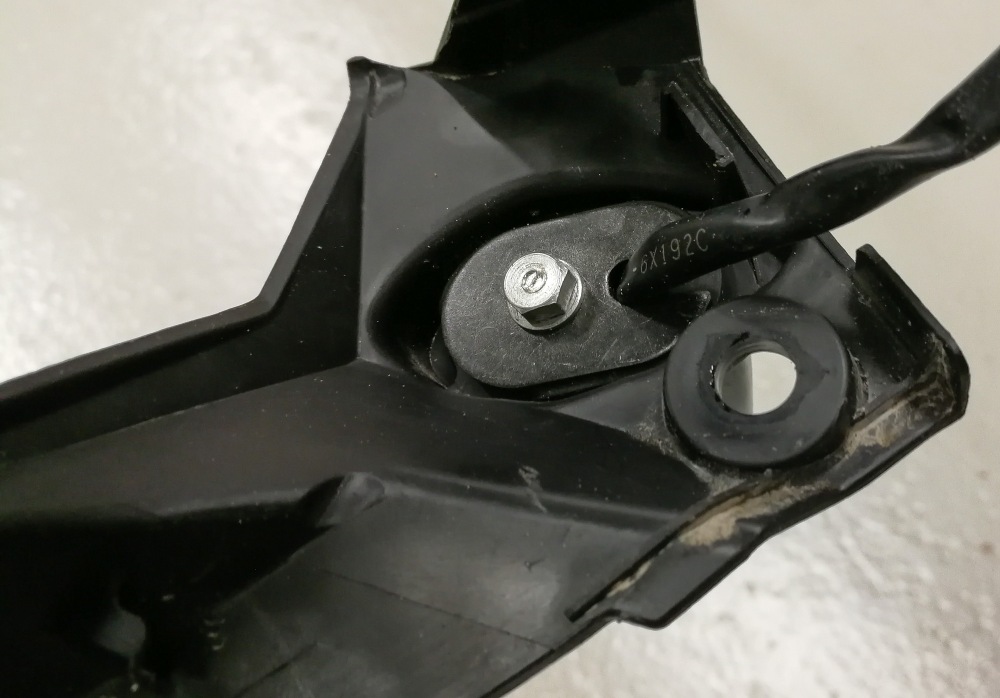
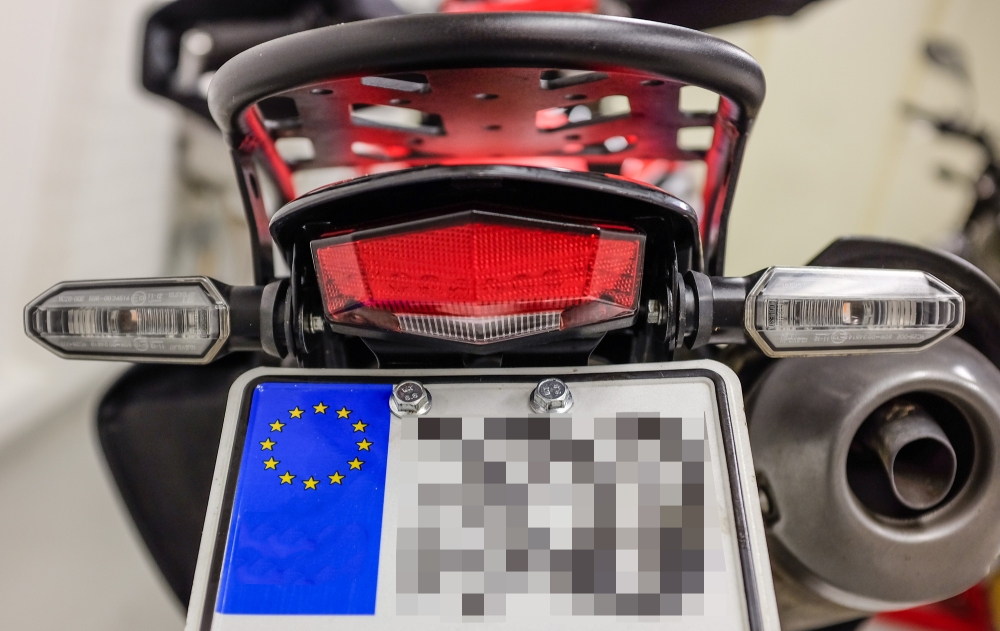
The licence plate itself is mounted using two bolts and a plastic backing plate.
Put the seat, rack and other stuff back on and you are done.

Where to buy?
DRC Edge 2
Amazon: DRC Edge 2 Red LED Tail Light w/ Holder Kit for 2012-2013 CRF250L
The connector
http://shop.12oclocklabs.com/index.php?route=product/product&path=25&product_id=147
OR
https://www.crfsonly.com/catalog/product_info.php/cPath/355_358_362_370/products_id/6370

Looks great! I’d like to know how this performs in dirt / rain. Actually that kind of big euro plate might be an advantage there.
LikeLiked by 1 person
I’m assuming it will throw dirt on my back…
LikeLike
Another amazingly de-tailed write up!
Thank you
LikeLiked by 1 person
Thanks!
LikeLike
Just some FYI for U.S. Rally owners. I installed this same kit on my 2017 U.S. Rally today. Many of the retailers of this kit are indicating that it is redesigned for use with stock 2017 turn indicators. IT IS NOT. Stock U.S. market Rally’s (with the extra-large dorky turn indicators) use a slightly different system for mounting the indicators to the tail. I found it easier to grind out the DRC kit to a large oval matching the stock tail assembly. It’s relatively easy to do, but I though it was important to note. Also, this blog is the premier site on the interwebs for all things Rally.
Cheers!
-SouthWest
LikeLike
Agree 100% with Jason’s comment above. I’ve just done the same modification to my DRC kit to use the stock lights.
LikeLike
There is now a new version of the tail tidy for the Rally 2017+!
http://www.drcproducts.com/elect/d45-18/index_crfl.html
LikeLike